This Christmas, Santa delivered a surprise that quickly became the star of our kitchen: a cake pop maker! If you’re wondering what that is, picture a glorified waffle iron, but instead of waffles, you get adorable, bite-sized cake balls. My oldest daughter was thrilled, and soon the whole family was in on the fun.
The cake pop maker vs. traditional cake pops
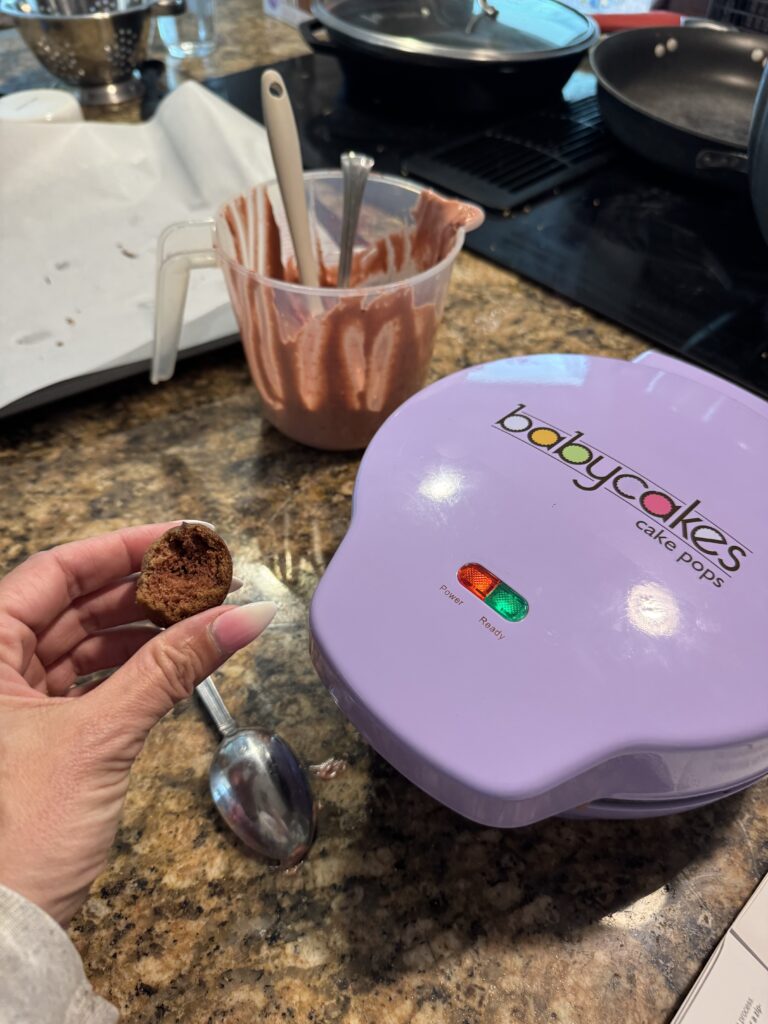
A classic cake pop – like the ones at our favorite Seattle-based coffee chain – is made by baking a cake, crumbling it, and mixing it with frosting to create a dense, rich mixture. This is then rolled into balls, placed on sticks, and dipped in chocolate or candy coating. But with the cake pop maker, you simply drop cake batter into the machine and out pop perfectly round, light cake balls – no crumbling or mixing required! While these are a bit lighter and trickier to dip, they’re just as delicious and much easier (and cleaner!) to make with kids.
Our Red Velvet Cake Pop Recipe
We decided to use a classic red velvet cupcake recipe for our cake pops. Here’s how we did it:
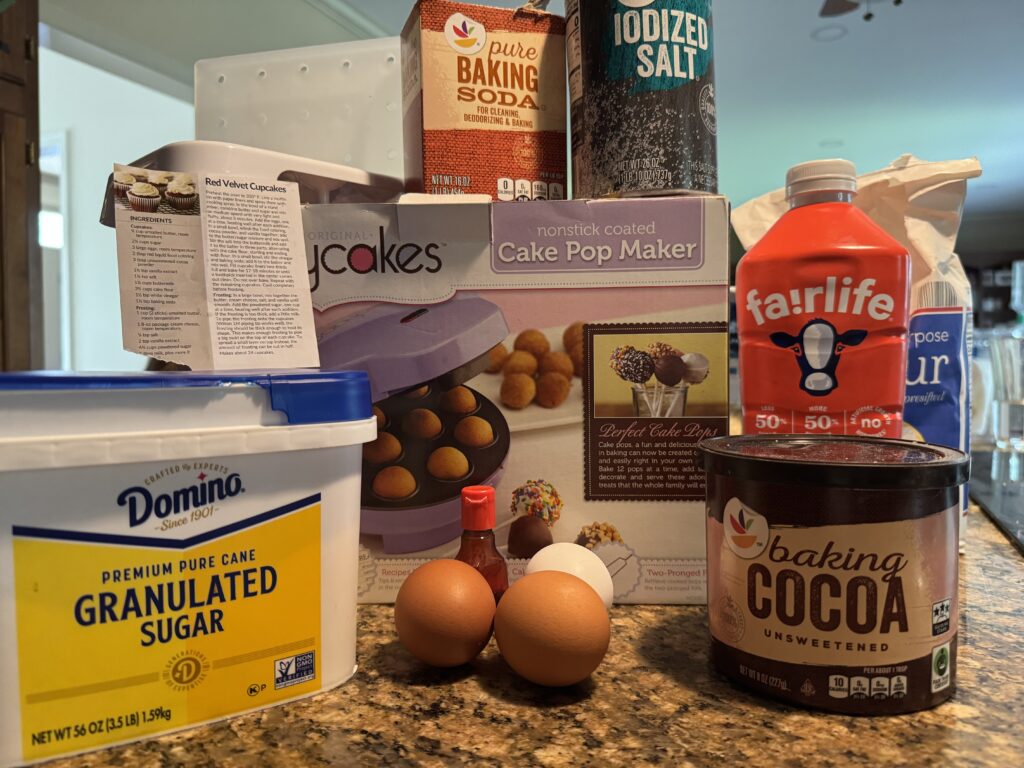
Ingredients
For the cake:
- ¾ cup unsalted butter, room temperature
- 2¼ cups sugar
- 3 large eggs, room temperature
- 2 tbsp red liquid food coloring
- 3 tbsp unsweetened cocoa powder
- 1½ tsp vanilla extract
- 1½ tsp salt
- 1½ cups buttermilk
- 3½ cups cake flour
- 1½ tsp white vinegar
- 1½ tsp baking soda
For the frosting (if you want to make traditional cake pops):
- 1 cup (2 sticks) unsalted butter, room temperature
- 1 8-oz package cream cheese, room temperature
- ¼ tsp salt
- 2 tsp vanilla extract
- 4½ cups powdered sugar
- ⅓ cup milk, plus more if needed
For dipping:
- 1 bag chocolate chips or candy melts
- Sprinkles or decorations of your choice
Instructions
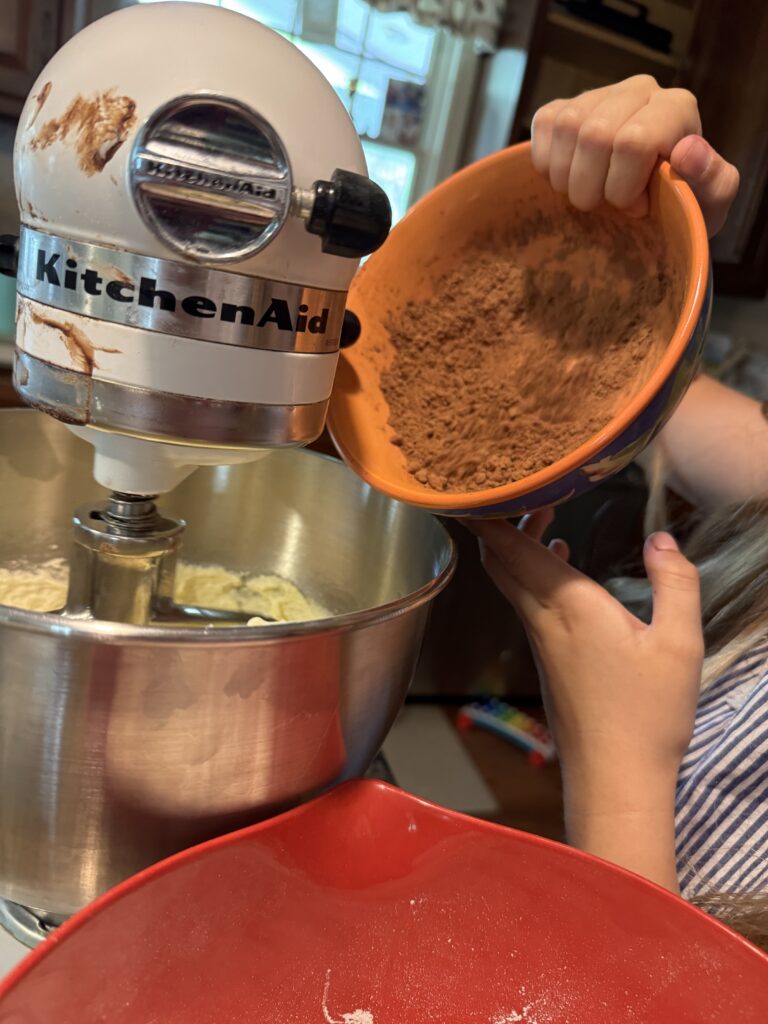
1. Make the Cake Batter
- Preheat your cake pop maker according to the manufacturer’s instructions.
- In a stand mixer, cream together butter and sugar until light and fluffy (about 5 minutes).
- Add eggs one at a time, mixing well after each addition.
- In a small bowl, whisk together food coloring, cocoa powder, and vanilla. Add this to the butter/sugar mixture and mix well.
- Stir salt into the buttermilk.
- Add flour and buttermilk to the batter in three parts, alternating between the two, starting and ending with flour.
- In another small bowl, stir together vinegar and baking soda, then add to the batter and mix well.
2. Bake the Cake Pops
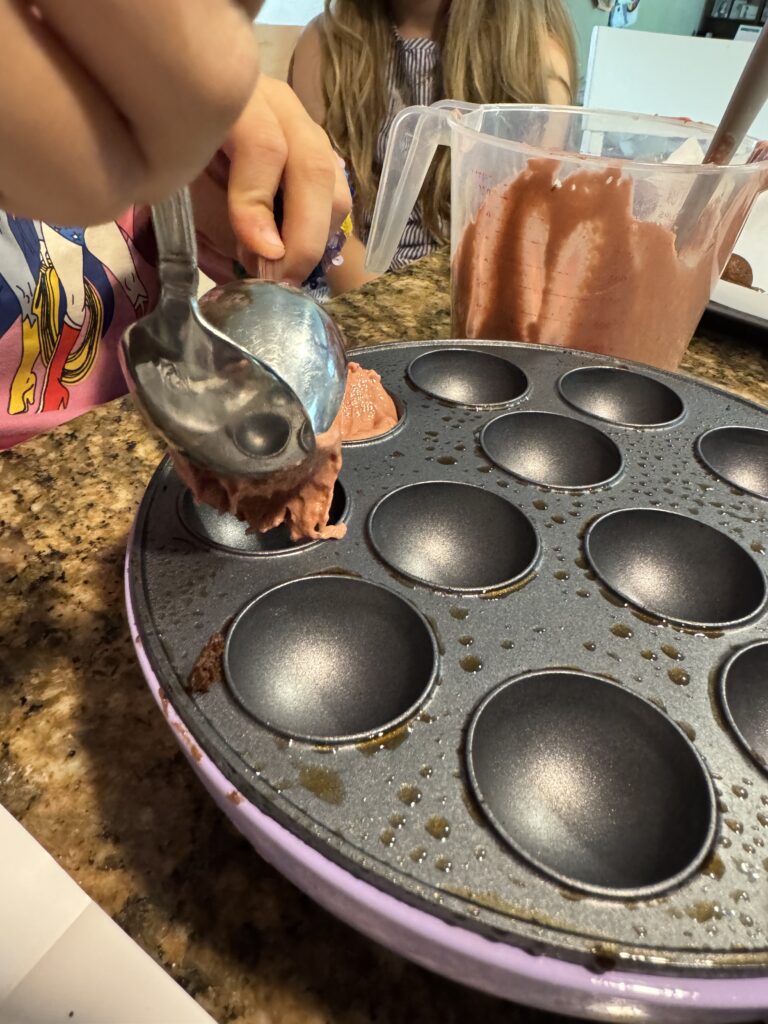
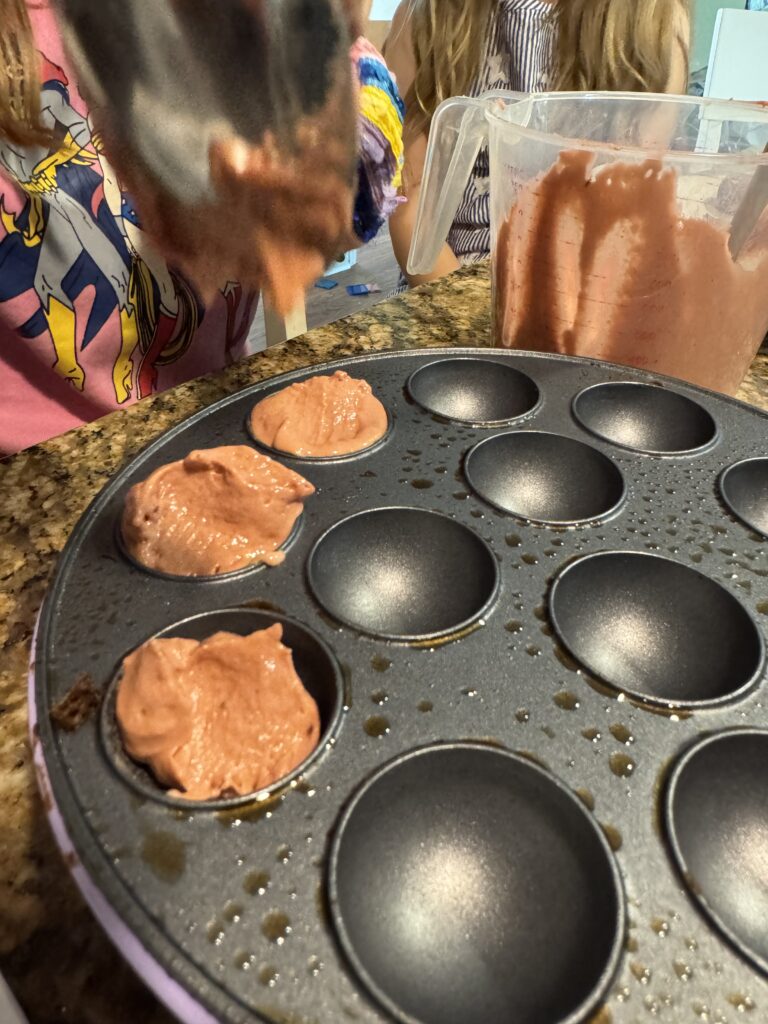
- Drop spoonfuls of batter into the cake pop maker, filling each cavity about two-thirds full.
- Close the lid and bake according to your maker’s instructions (usually 4-5 minutes) until a toothpick comes out clean.
- Remove cake balls and let cool completely.
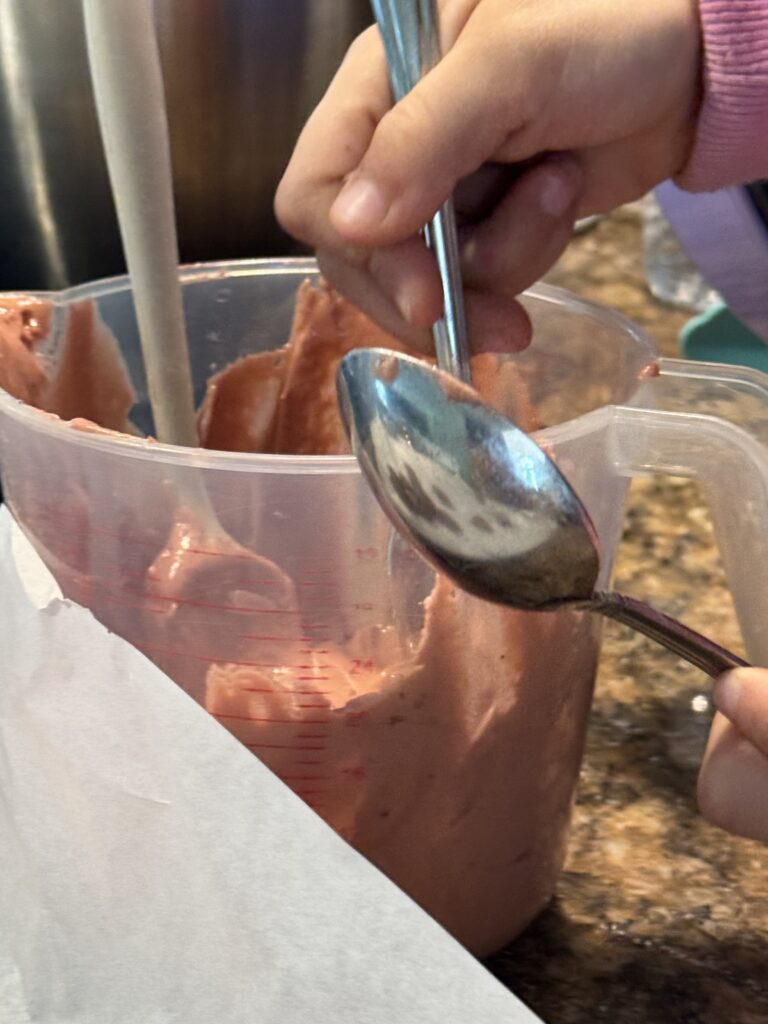
3. Prepare for Dipping
- Melt chocolate chips or candy melts. (Pro tip: I had trouble melting chocolate in the microwave—steam ruined two batches! The double boiler method worked perfectly.)
- Dip each cake pop stick into the melted chocolate, then insert into a cake ball. Let the chocolate set—this helps keep the stick in place during dipping.
4. Dip and Decorate
- Once the sticks are secure, dip each cake ball into the melted chocolate, gently tapping off excess.
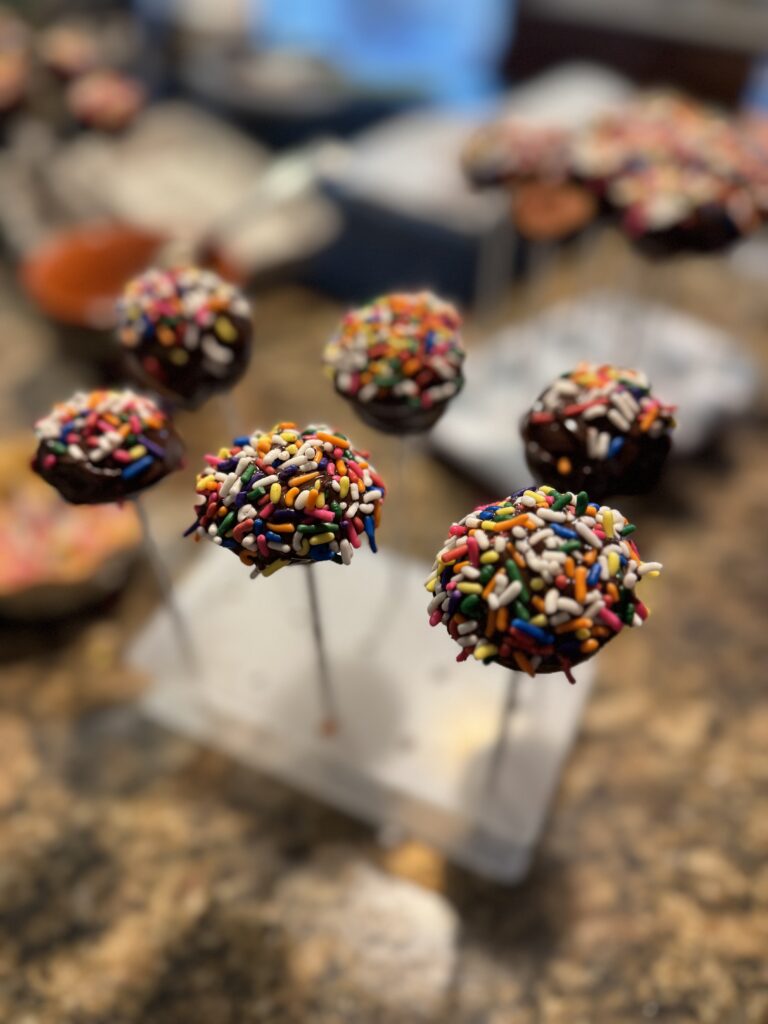
- Decorate with sprinkles, crushed candy canes, or anything festive you have on hand.
- Place cake pops upright in a styrofoam block or a box with holes to set.
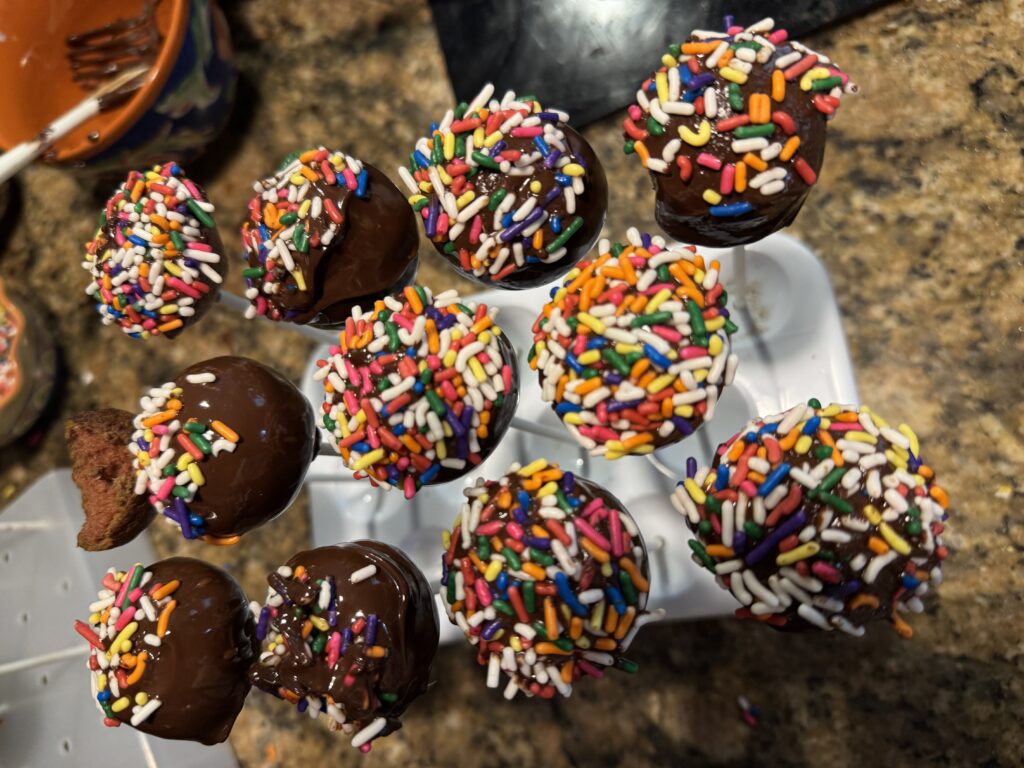
The results
We ended up with about 50 cake pops – plenty to share with neighbors and friends! The kids loved decorating them, and the results were both adorable and delicious. Honestly, after seeing how easy and fun these were to make, I’m not sure I can justify spending $4 per cake pop at the coffee shop anymore.
Final thoughts
If you’re looking for a fun, family-friendly holiday baking project, give these red velvet cake pops a try – especially if Santa brings you a cake pop maker! Whether you dip them in chocolate or just dust them with powdered sugar, they’re sure to be a hit with kids and adults alike.